A kitchen island sounds straightforward — a freestanding surface in the middle of the kitchen. But spend any time in a poorly planned one and the reality becomes clear fast: a misplaced, undersized, or wrongly surfaced island doesn't just fail to help. It actively gets in the way. It interrupts traffic, breaks up workflow, and turns what should be the most social room in the house into an obstacle course. Getting the island equation right, on the other hand, can transform how a home feels and functions every single day. The difference almost always comes down to three variables: placement, size, and material.
Why Placement Is the First and Most Important Decision
Before you think about stone versus wood or how many stools to squeeze in, the location of the island has to work with the kitchen's existing geometry. Kitchen design has long relied on the concept of the "work triangle" — the relationship between the refrigerator, sink, and cooktop — and a well-placed island either respects that triangle or deliberately and thoughtfully reorganizes it. A poorly placed island cuts straight through the triangle, forcing cooks to navigate around it every time they move between primary stations.
The most common mistake is pushing an island too close to the perimeter countertops or appliances. Tight clearances are uncomfortable to work in and create genuine safety hazards, especially when oven doors are open or multiple people are moving around the kitchen simultaneously.
The National Kitchen and Bath Association (NKBA) recommends a minimum of 42 inches of clearance on all walkable sides of a kitchen island for single-cook kitchens, and 48 inches for multi-cook households.Those numbers aren't arbitrary. Forty-two inches gives one person room to work at the island while another passes behind. Forty-eight inches allows two people to work back-to-back comfortably, which matters enormously in households where cooking is shared. If your kitchen can't accommodate those clearances on at least two or three sides after an island is placed, you're better off without one — or with a smaller, more appropriately scaled version.
Traffic Flow and the Social Dimension
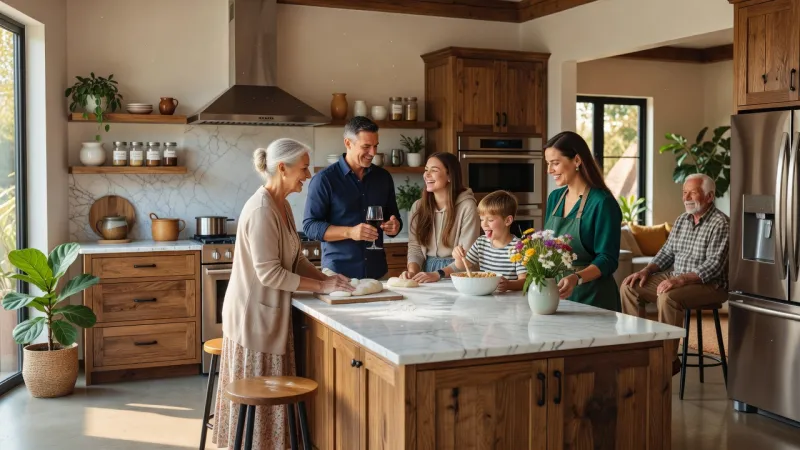
Placement also has to account for how people move through the kitchen as a living space, not just as a cooking space. A kitchen island in an open-plan home typically sits at the intersection of the kitchen proper and the living or dining area. If it's positioned so that people walking from the front door to the living room have to detour around it, you've built a barrier into the daily rhythm of the home. The best placements create a clear primary path through the space while still giving the island enough breathing room to function.
Islands that double as informal eating spots need to be oriented toward where people naturally gather — usually the living room or a view — rather than facing a blank wall. This sounds obvious but is frequently ignored when islands are designed around appliance and plumbing logic alone.
Getting the Dimensions Right: Minimum Thresholds and Practical Reality
Size is where a lot of well-intentioned island plans fall apart. Homeowners see the floor plan, think there's room, and spec an island that looks proportionate on paper but turns out to be functionally marginal in practice. The NKBA has established clear minimums here too.
The NKBA guidelines specify that an island should be no less than 4 feet long and 2 feet deep to be considered functionally useful for food preparation.Four feet by two feet — roughly 48 by 24 inches — is the floor, not the goal. At that size, you have enough surface to roll out dough, stage ingredients for a meal, or plate dishes without bumping into your own elbows. Below that, the island becomes more of a visual gesture than a working surface. It looks like an island but doesn't behave like one.
In practice, most designers recommend aiming for at least 6 to 7 feet in length if the kitchen can accommodate it. That length allows for genuine multifunctionality — prep on one end, a couple of seats on the other — without everything feeling crowded. Width can also increase meaningfully beyond 24 inches if the kitchen is large enough; 30 to 36 inches of depth allows for a double-sided working surface and creates room for a deeper sink or a cooktop installation without the island feeling narrow.
Seating Geometry: The Overhang That Determines Comfort
If seating is part of the plan — and for most households it should be, since the island is where people naturally perch while someone cooks — the overhang dimension matters more than most people realize. Too little and knees hit the cabinet base; too much and the overhang feels unstable without proper structural support.
Counter overhang for bar-height seating requires a minimum of 12 inches of knee clearance depth, while standard counter-height seating requires at least 15 inches.The distinction between bar height and counter height also affects stool selection, which affects the overall feel of the space. Counter-height islands (typically 36 inches, matching standard kitchen counter height) pair with stools that are 24 to 26 inches tall and generally feel more casual and inclusive — easier for children and older adults. Bar-height islands (typically 42 inches) have a slightly more formal, lounge-like quality and require taller stools. Neither is inherently superior; the right choice depends on who uses the kitchen and how.
Material: Function First, Aesthetics Second
The countertop material on an island is often where the most money gets spent, and it's where the most visible design decisions get made. But material choice is a functional decision before it's an aesthetic one, because different surfaces behave very differently under the conditions of daily kitchen use.
Quartz
Engineered quartz has become one of the most practical island surface choices for households that actually cook. It's non-porous, so it doesn't require sealing and resists staining from acidic foods like citrus and wine. It's consistent in pattern, which makes matching seams across a large island easier. The tradeoff is that it can be damaged by high heat, so trivets and hot pads remain necessary. It also has a manufactured quality that some people find less interesting than natural stone.
Marble
Marble is beautiful and genuinely functional for pastry work — its naturally cool surface is ideal for working with butter-based doughs. But marble is porous, prone to etching from acids, and will develop a patina of marks over time that some owners find characterful and others find distressing. It's a high-maintenance choice that rewards people who understand what they're signing up for.
Butcher Block
Wood surfaces, particularly hard maple or walnut butcher block, bring warmth to a kitchen that stone can't replicate. They're gentle on knives, which is a real functional benefit for serious cooks. They do require periodic oiling and are vulnerable to water damage if not properly maintained, particularly around a sink. Many designers use butcher block on part of an island — the prep end — while using stone on the remainder, getting the best of both materials.
Concrete and Other Statement Materials
Poured concrete, soapstone, and quartzite each have their advocates and their genuine merits. Concrete can be cast in custom shapes and tinted to any color, which offers design flexibility that no other material matches. Soapstone is non-porous, develops a beautiful natural patina, and is extremely heat resistant. Quartzite — often confused with quartz but actually a natural metamorphic stone — is harder than marble and more resistant to etching, though it still requires sealing. The common thread is that any material can work well when its properties are understood and managed appropriately.
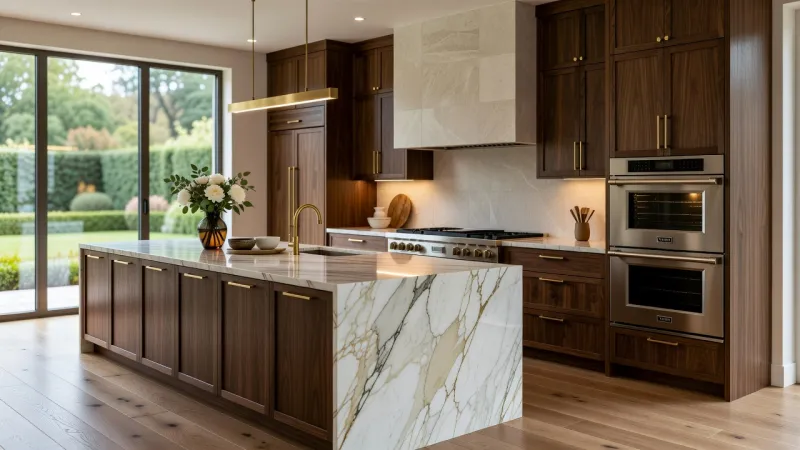
The Waterfall Edge: Design Trend or Lasting Choice?
Waterfall edges on kitchen islands, where the countertop material extends vertically to the floor, became a widely documented design trend in residential kitchen renovations during the 2010s and are now standard in high-end kitchen design vocabulary.The waterfall edge is one of those details that divides designers. Proponents argue it creates a sculptural, furniture-like quality that elevates the island from a built-in fixture to a piece of design. It also protects the cabinet sides from scuffs and makes cleaning the base of the island easier. Critics point out that it dramatically increases material costs — you're essentially adding two more countertop panels — and that the effect depends heavily on how well the stone pattern is matched at the miter joint. A poorly matched waterfall on a book-matched marble slab looks worse than no waterfall at all.
Whether it's worth it comes back to the specific material and the specific kitchen. On a continuous-grain wood surface or a strongly veined natural stone, the waterfall can be genuinely stunning. On a uniform engineered material, its visual impact is more modest and the cost premium harder to justify.
When an Island Isn't the Right Answer
It's worth saying clearly: not every kitchen benefits from an island. Galley kitchens, small L-shaped kitchens, and any kitchen where the clearance math doesn't work are genuinely better without one. A peninsula — an island that's connected to a wall or cabinet run on one end — often provides most of the same benefits with a smaller footprint and without the need for clearance on all four sides. A rolling cart can provide moveable prep surface and storage without committing to permanent square footage.
The trap is treating the island as a status feature rather than a functional one. When a kitchen is designed around the aspiration of having an island rather than around how the kitchen actually needs to work, the result is usually a space that looks impressive in photographs and frustrates people every time they cook in it.
Pulling It Together: The Checklist Before You Commit
Before finalizing any island plan, it helps to work through a practical checklist. Can you walk completely around the island with 42 inches of clearance on every side — or 48 if multiple people typically cook together? Is the island at least 4 feet long and 2 feet deep? If seating is planned, does the overhang provide at least 12 to 15 inches of knee clearance depending on the stool height? Does the island placement work with — rather than against — the primary work triangle? Is the countertop material matched to how the kitchen will actually be used, not just how it will look in photos?
If the answers to those questions are yes, the island has a genuine chance of becoming what a kitchen island is supposed to be: the place where food gets made, where homework gets done, where people naturally congregate, and where the day begins and ends. That's a different thing from a large surface that everyone has to squeeze past to get to the refrigerator. Getting the geometry right is what separates one from the other.
Sources
Every factual claim in this article was independently verified against the following sources:
- Guidelines For Kitchen Island Functionality Tindell's Lumber Co. | Sevierville, TN - Cleveland, TN - Knoxville, TN - Maryville, TN - Morristown, TN - Knoxville, TN — tindells.com
- Countertop Heights & Overhangs For Kitchen Seating: Design 101: — durasupreme.com
- What Size Should Your Kitchen Island Be? - Bradco Kitchens & Baths — bradcokitchen.com
- Waterfall Countertop Ends: Are They Right for Your Kitchen Island? — deslaurier.com